Your cart is currently empty!

A Complete Workflow for Computer Product Photography
I’ve been passionate about PC building since the early-to-mid 1990s. I still remember upgrading my dad’s 486DX2—installing a Cyrix 586 CPU, adding RAM, and upgrading the hard drive multiple times to keep that computer running. Back then, documenting those upgrades with photos never crossed my mind. Even the first computer I built from scratch, in the early 2000s, only has a few scattered photos. They lack the level of detail I wish I had today, but back then, digital cameras weren’t as accessible, and computer product photography wasn’t something I considered.
Fast forward to 2017, when I reignited my passion for PC building and restoring older computers. With advancements in technology—not just in hardware but in tools for creating and sharing digital content—I realized the importance of documenting my work. Computer product photography became a critical part of that process, allowing me to showcase the systems I restore in a professional way. Today, I immerse myself in every aspect of technology, from building and restoring to coding, designing, and sharing my projects through photography. This focus on computer product photography allows me to highlight my efforts, share my passion, and preserve the story of each build.
Documenting computers isn’t just a simple point-and-shoot process. It’s a deliberate workflow—a series of steps that involves planning, capturing, and editing, each as important as the next. This computer product photography workflow ensures that my restored systems look professional, my work is preserved, and my passion reaches others through platforms like social media and my website.
Why Documenting Matters
For me, the real joy comes from being hands-on with computers—whether it’s building, upgrading, or restoring them. I love the process of assembling components, installing the operating system, and ensuring everything works perfectly by configuring the right drivers. Once that’s done, I might play a few games to test the system for a week or two, but soon, it’s on to the next project.
Without documentation, though, all that effort becomes a fleeting memory. That’s why I make it a priority to capture the process. I take a lot of photos—before and after shots for restorations, detailed images of the computer case, motherboard, and individual components. This isn’t just for aesthetics; it’s also about creating a record of the computer’s build, whether it’s using original parts or upgraded components.
Having detailed photos and notes serves multiple purposes. It helps me keep track of what’s inside each system, maintain an inventory of parts, and log what I spent on components. This information is invaluable if I decide to sell a part or the entire system—because I already have a visual and written history ready to go. It also makes it easy to share my builds on platforms like Facebook, Instagram, or Twitter, showcasing my work to a broader audience.
Preparing for the Shoot
Preparing for a photoshoot starts with a lot of planning. First, I think about what I’m shooting and why. Am I documenting new parts with their boxes or used components? Will I be taking before-and-after shots of a restoration, or focusing on the final build? Each purpose dictates a different approach, so clarity is key from the start.
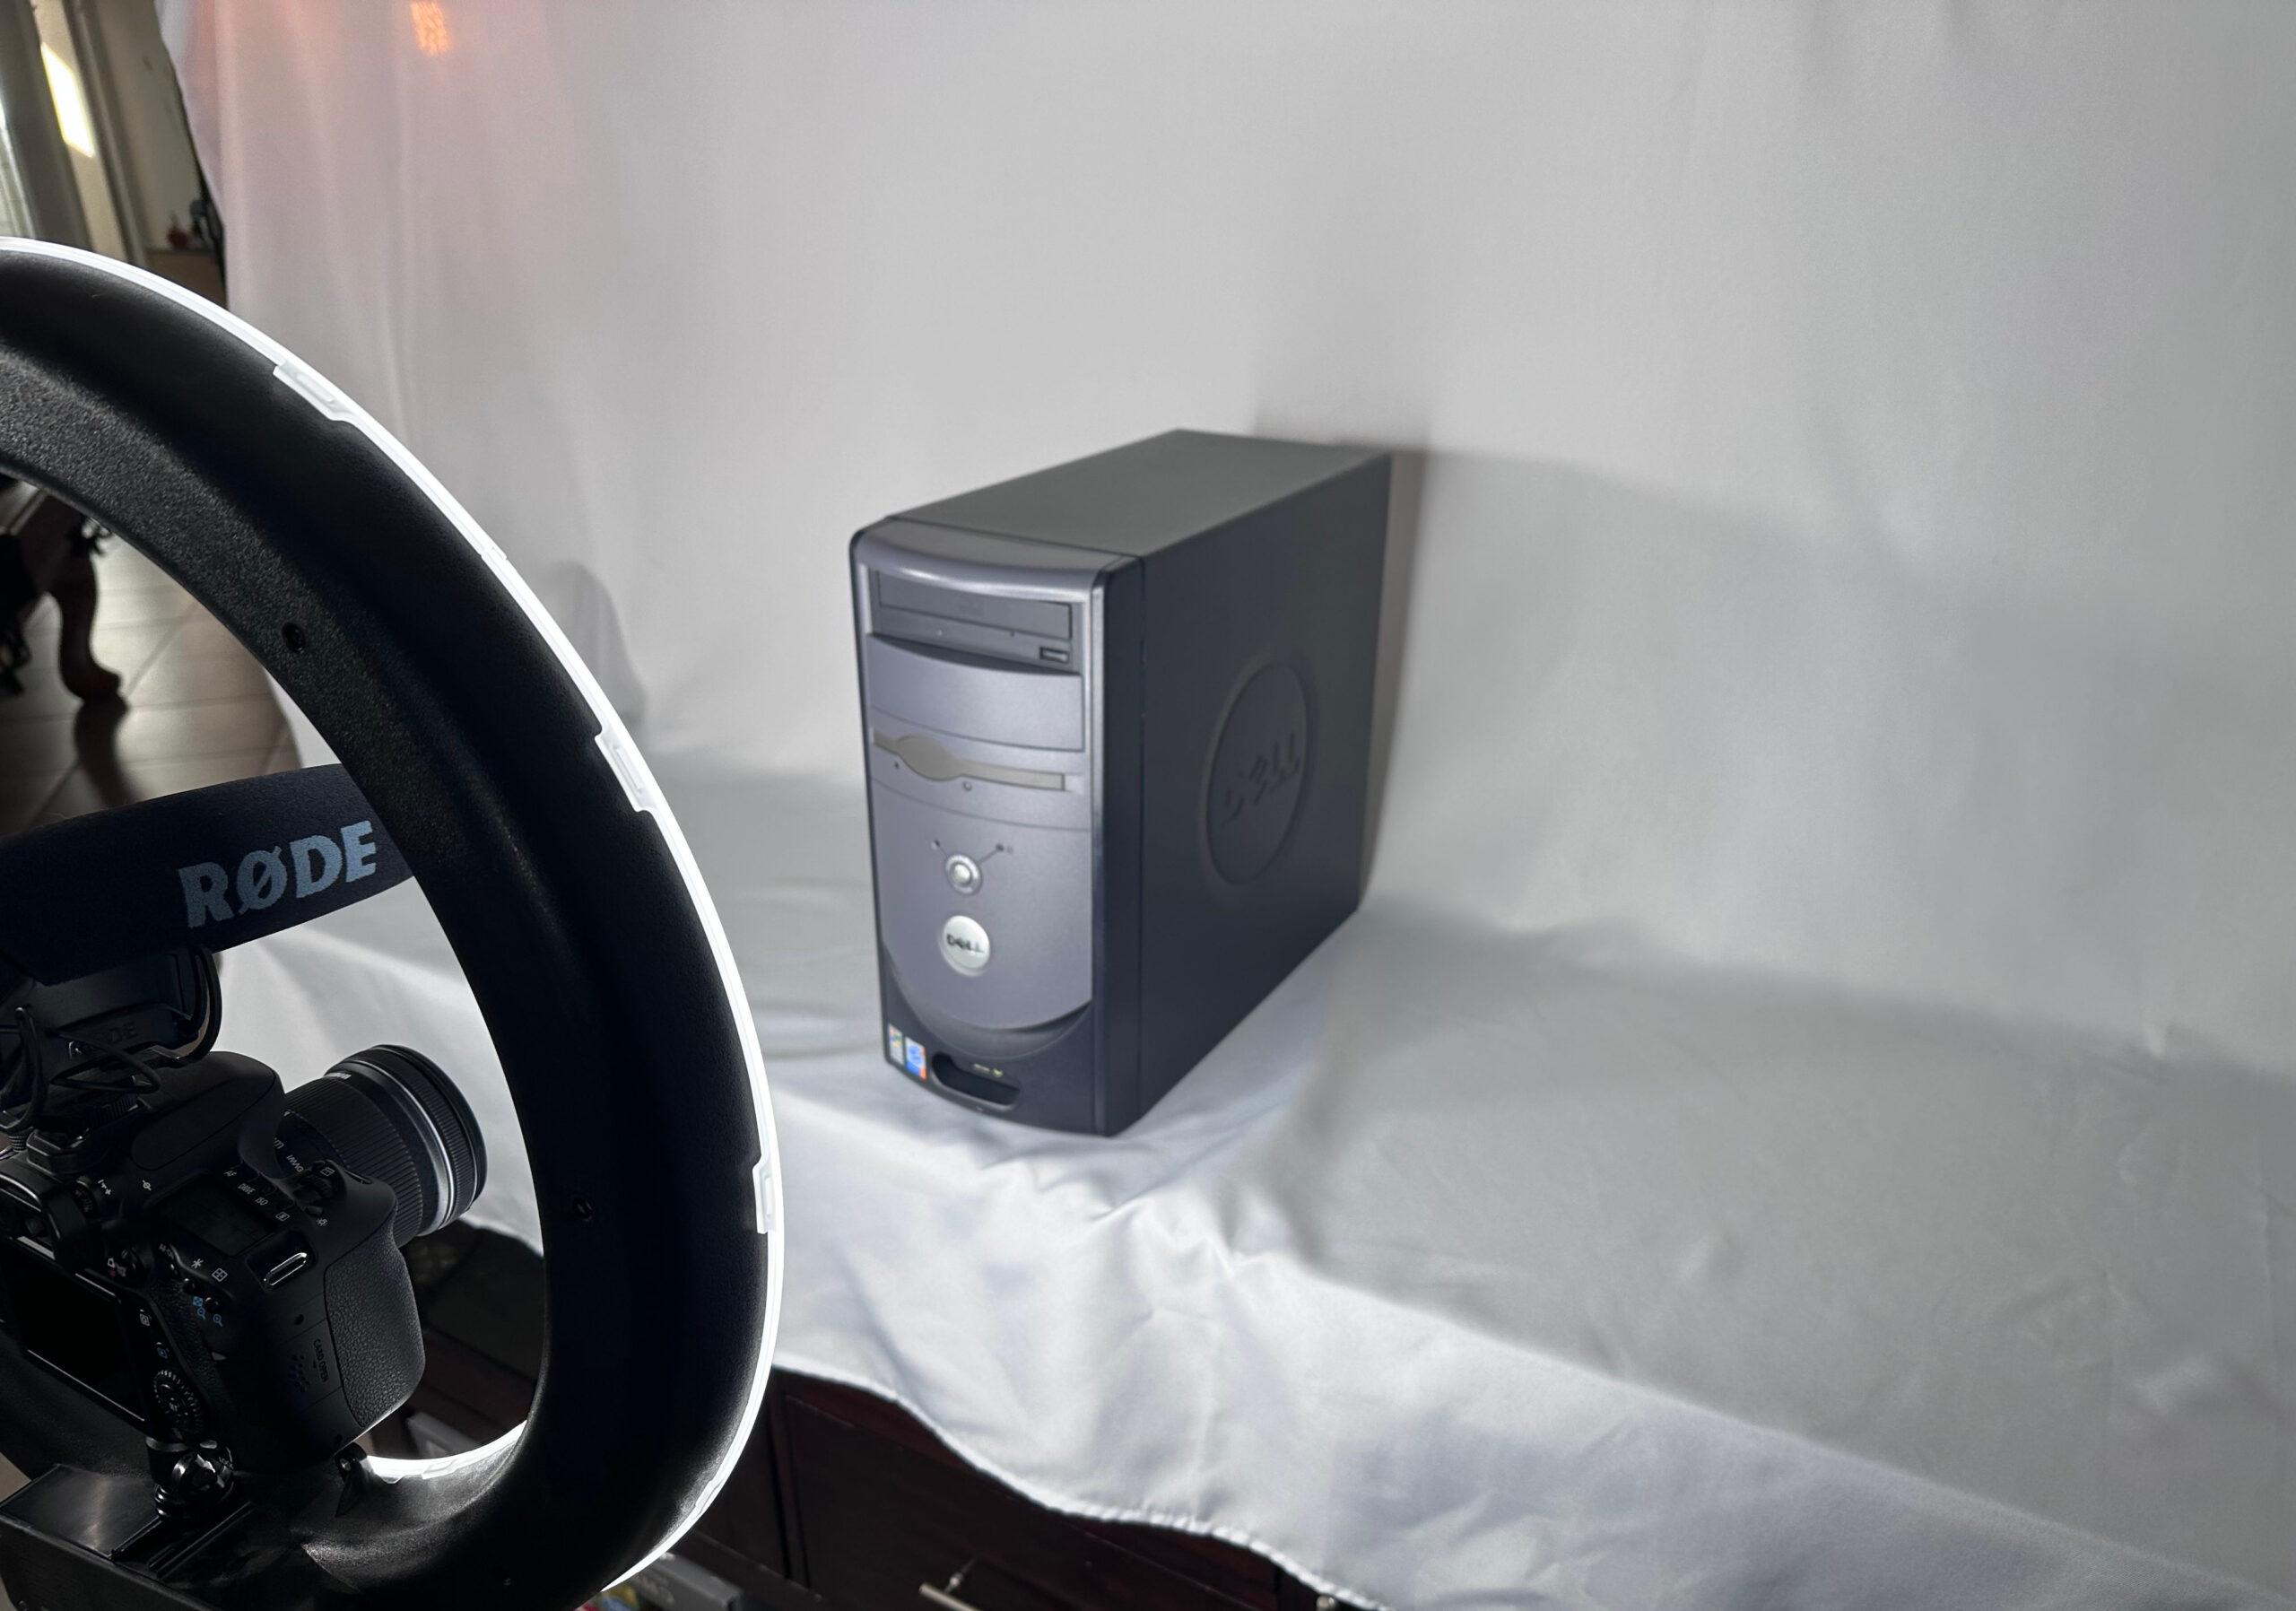
Next, I consider the setting. Where will I take the photos? Fortunately, I have a dedicated space in my house that works well for photographing computers and components. I’m also lucky to have some equipment on hand, like LED lighting and a ring light (which I repurpose as my tripod). These tools help create consistent lighting and reduce shadows, but sometimes I experiment with natural light depending on the mood I want to capture.
Background is another crucial factor. A clean, uncluttered background keeps the focus on the computer or components, so I often use a white colored sheet as a portable backdrop. I also plan the framing and angles I’ll use, deciding which parts of the build to highlight. For instance, I might want to showcase the interior layout, upgraded GPUs, or unique case designs.
Equipment preparation is just as important. I ensure my camera’s memory card is clear, batteries are fully charged, and lenses are clean and ready to go. I typically choose lenses based on the type of shots I want—for wide views, a standard zoom works well, but for detailed component shots, I’ll use a macro lens. I also keep a spreadsheet on my iPad Pro handy to track my camera settings (like aperture and shutter speed) so I can replicate or adjust the setup for future shoots.
Finally, I organize my workspace to minimize distractions. This includes having all the components or computers laid out neatly, cleaning up any dust or smudges, and double-checking that everything I want to photograph is easily accessible. Good organization not only saves time but also ensures that every detail of the shoot is captured perfectly. With all the preparations complete—from planning shots to organizing equipment—I’m ready to bring my vision to life. Capturing the photos is where creativity and preparation meet, and it’s my favorite part of the process.
Capturing the Photos
Once my preparations are complete, it’s time to bring the plan to life. I use the checklist I created during setup as a guide to ensure I capture every shot I’ve planned. This includes standard angles, like the front, back, and sides of the computer, as well as more creative compositions. For example, I take diagonal shots from the front or back corners and remove the side panel to photograph the internal components. These varied perspectives help showcase the computer’s design and functionality.
Retro computers, in particular, can be visually understated, so I make it a priority to highlight the details that make them unique. Close-ups of buttons, stickers, and ports help draw attention to the finer elements of the build. These shots not only add visual interest but also give viewers a clearer sense of the computer and its components, even if they’ve never seen them in person. By experimenting with creative angles, I aim to make even plain-looking systems feel dynamic and engaging.
For equipment, I rely on my Canon 80D and three lenses: a standard zoom for wide shots, a macro lens for close-ups, and a wide-angle lens for full-system photos. The Canon Connect iOS app allows me to adjust settings and take photos remotely from my phone, making the process more efficient and precise. This flexibility is especially helpful when I’m focusing on intricate details or working in tight spaces.
Before diving into the full shoot, I always take a few test shots. These help me fine-tune the lighting, focus, and framing, ensuring everything looks just right. While test shots are invaluable, the real magic often happens in post-processing, where I refine and enhance the images to bring out their best qualities. By combining a thorough plan with careful execution, I’m able to produce polished, professional photos that truly showcase each computer’s story.
With the photos captured, the next step is to refine them into polished visuals that truly showcase the details of each build.
Post-Processing
Post-processing is where the magic happens, but it’s also an area where I’m still learning the ropes. Currently, I use the Adobe Photography Plan, which gives me access to Lightroom and Photoshop. While these tools are powerful and user-friendly, I’m not a fan of paying subscription fees, especially since I don’t use them every day. That’s why I’ve recently started exploring Darktable, an open-source alternative to Lightroom. Darktable has a steeper learning curve, but as someone who wants to deepen my photography skills, it feels like a worthwhile investment of time.
Regardless of the software, my post-processing workflow focuses on a few key tasks. First, I adjust the brightness and contrast to ensure the photo is clear and visually appealing. Then, I straighten the image if needed, which is particularly important for computer photos to maintain a clean, professional look. Next, I apply a watermark to protect my work and maintain a consistent brand identity. Finally, I export the photo in the appropriate resolution and format for its intended use—whether it’s for my website, social media, or another platform.
One area I’m experimenting with is batch processing. While it’s tempting to automate the editing process, I find that many photos require individual attention, especially when it comes to fine-tuning details like color balance or cropping. My goal is to strike a balance between efficiency and quality, perhaps by developing a hybrid approach where I apply basic edits in bulk but still review each photo for manual adjustments.
Post-processing isn’t just about making photos look better; it’s about bringing out the best in each shot. Whether it’s emphasizing the shine of a retro case or enhancing the colors of a motherboard, the editing process helps tell the story of the computer in a way that raw images simply can’t.
Once the images are edited and polished, they’re ready to be shared. For me, publishing these photos isn’t just about displaying my work—it’s about connecting with others and preserving the story of each computer I restore.
Publishing and Sharing
After completing the post-processing, the next step is to share the results. Right now, my primary platform is this website, where I showcase both the photos and detailed information about each computer. It’s a space to document my work, reflect on my progress, and share my passion for computer restoration with others who might have similar interests.
In the future, I’d love to expand beyond my website. Platforms like Instagram and marketplaces such as eBay or Facebook Marketplace could be great opportunities—not just for sharing my photography but also for connecting with potential buyers if I ever decide to sell my computers. These platforms allow for more interaction and visibility, turning each post into a way to engage with the broader tech community.
That said, one of my biggest challenges right now is organization. Deciding where to save original files versus post-processed images and maintaining a clear folder structure can be overwhelming, especially as my library grows. I’m working on creating a system that keeps everything accessible and well-labeled, so I can find and repurpose content easily when needed.
Ultimately, the goal of publishing my work is twofold. First, it’s a personal archive—a way for me to revisit my projects and see how far I’ve come. Second, it’s a way to inspire and connect with others who share a love for retro tech, computer components, and creative photography. As I continue refining my workflow, I’m excited to see how sharing my work evolves and the kinds of connections it might foster.
Publishing my photos is the culmination of everything I love about this process: the creativity, the technical challenges, and the joy of sharing my passion with others. Whether I’m showcasing a fully restored retro PC or diving into the details of a motherboard, each post is a chance to preserve the story of a computer and connect with a community that shares my enthusiasm. As I continue refining my workflow and exploring new platforms, I’m excited to see where this journey takes me—both as a photographer and as someone who loves breathing new life into old technology.
Each photo I take is more than just an image—it’s a way to document the countless hours spent restoring a piece of technology to its former glory. Sharing these moments allows me to connect with others who appreciate the history and artistry of computers, while also building a personal archive that inspires me to keep growing.
